Hi loves!
Im very excited to show you how to use the Anastasia Beverly Hills Cream Contour Kit and to speak about how the product works!
I Filmed a demo to show you some of the tricks I use to Cream Contour, while simultaneously using this need product!
Pigmentation & Application
This Product is very creamy, which allows the artist to blend the makeup properly and at the pace they are comfortable doing so. To help the product blend quicker and easier, you can use MAC COSMETIC FIX PlUS. You do not need any fancy brushes to do this, just some thin, dense, and sparse brushes. One product I highly suggest is a beauty blender, that will help with meshing everything together in the end.
Warning!
When highlighting underneath any under eye area, be aware that there will be fine lines that will cause creasing. To prevent this, I used Mac Prolong Concealer before applying to the highlight underneath the eyes.
Start from blending the light then the dark to help with any errors! The cool thing about blending creams is how easy it is to fix any problems!
Longevity
This product, if applied correctly can last all day! Set it with a all nighter setting sprat such as Urban Decays “All Nighter Setting Spray.”
Is it worth the Hype?
If you are a makeup artist, this is a total “go out and buy it!” If you are not, maybe think twice about whether you will be using much or if you feel more comfortable with powders.
Cost
$40 for each Kits: Light, Medium Deep
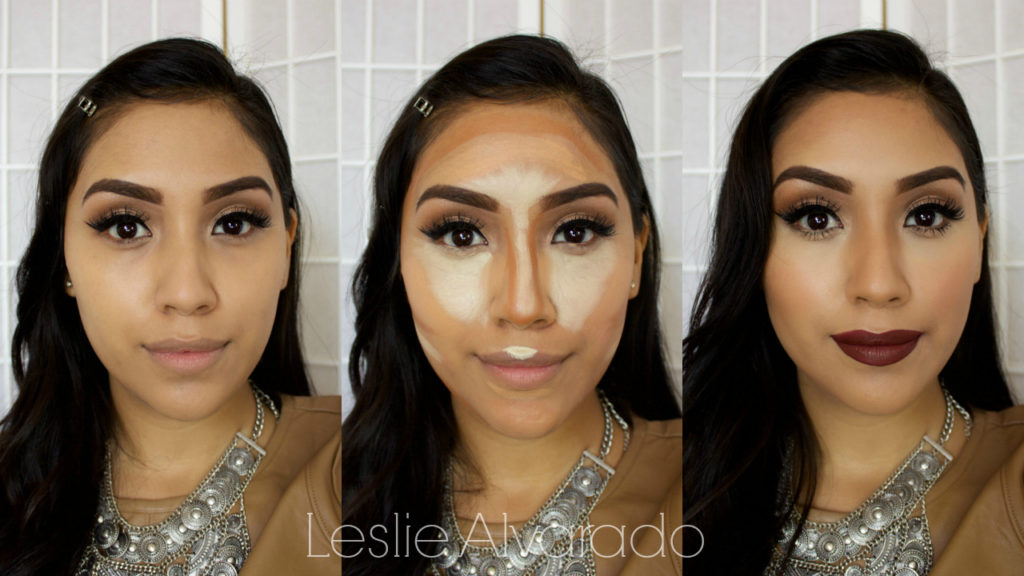
The Process of Achieving a Cream Contour: Medium Kit
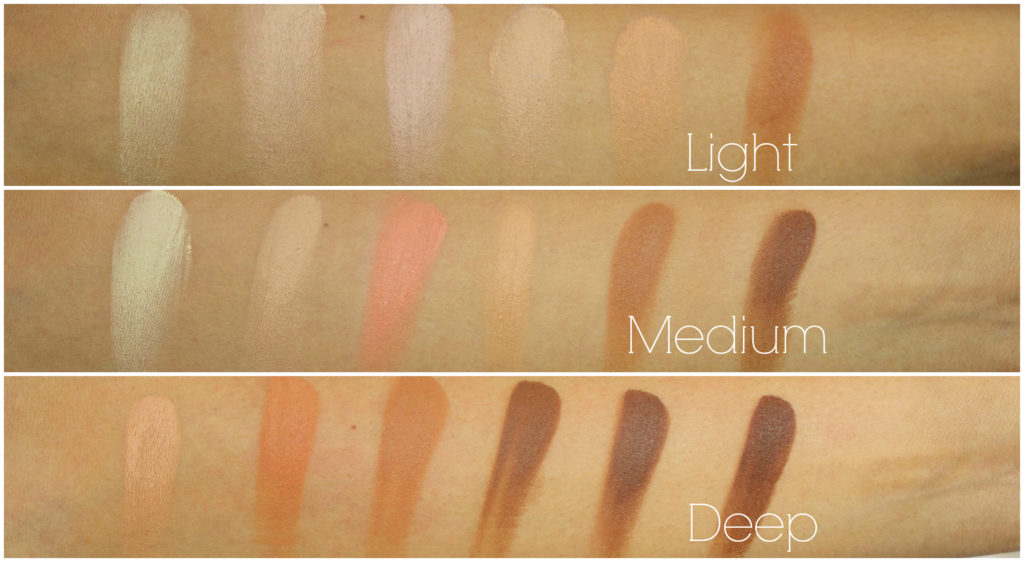
Swatches of all three Kits: Light, Medium, Deep
